How to get a Trial license for PBIVizEdit custom visuals
Short Summary:
- Free 30 day one-time full trial.
- Visuals installed from appsource.microsoft.com – Trial License options and steps explained in this page.
- Visuals downloaded directly from PBIVizEdit website – Full Trial License in the same email that had custom visual download link.
How to get the trial license
STEP 1:
From the table below, identify the license options available for the visual you are interested in. If your selected visual is eligible for a Microsoft Managed License, go to Step 2. Otherwise, go to Step 3
From the table below, identify the license options available for the visual you are interested in. If your selected visual is eligible for a Microsoft Managed License, go to Step 2. Otherwise, go to Step 3
| Visual Name | Available license option | |
|---|---|---|
Standard VisualsClustered Stacked BarClustered Stacked ColumnDual X-axis ComboDual Y-axis ComboHorizontal BulletLollipop ColumnMerged BarMultiple AxesPie with Legend LabelPopulation PyramidVertical BulletVertical Line | Certified Visuals Any certified(PRO) visual | Either directly from Appsource (Microsoft Managed License) OR from PBIVizEdit Website |
Standard Visuals100% Clustered Stacked Bar100% Clustered Stacked ColumnAdvanced LineBubble with Categorical X and YDual X-axis BarDual Y-axis ColumnLikertLollipop BarOverlapping BarOverlapping column | Only from PBIVizEdit Website | |
STEP 2
If Microsoft managed license option is available for your visual, use the table below to identify which license option - Microsoft managed license or PBIVizEdit managed license - is better for you.
If Microsoft managed license sounds better for you, go to step 4. Otherwise, go to step 3.
If Microsoft managed license option is available for your visual, use the table below to identify which license option - Microsoft managed license or PBIVizEdit managed license - is better for you.
If Microsoft managed license sounds better for you, go to step 4. Otherwise, go to step 3.
| Microsoft License | PBIVizEdit License | |
|---|---|---|
| Install Source | Microsoft App source | PBIVizEdit Website |
| Supported Environment |
| All Platforms |
| Credit card needed for Trial (no automatic charges at end of trial period. Buyer has to explicitly authorize recurring billing) | Yes | Not Applicable |
STEP 3: (If PBIVizEdit License applicable)
Get trial license from PBIVizEdit Website:
Get trial license from PBIVizEdit Website:
- Step 3a: Click on URL to open the trial license page for the visual: www.pbivizedit.com/gallery
- Step 3b: Select the license type corresponding to licenses that you need and click on ‘Get Trial’.
- Step 3c: Enter your business email, and click on ‘Get Trial License’
STEP 4: (If Microsoft managed License is applicable)
Get license from the visual page on Microsoft Appsource:
Get license from the visual page on Microsoft Appsource:
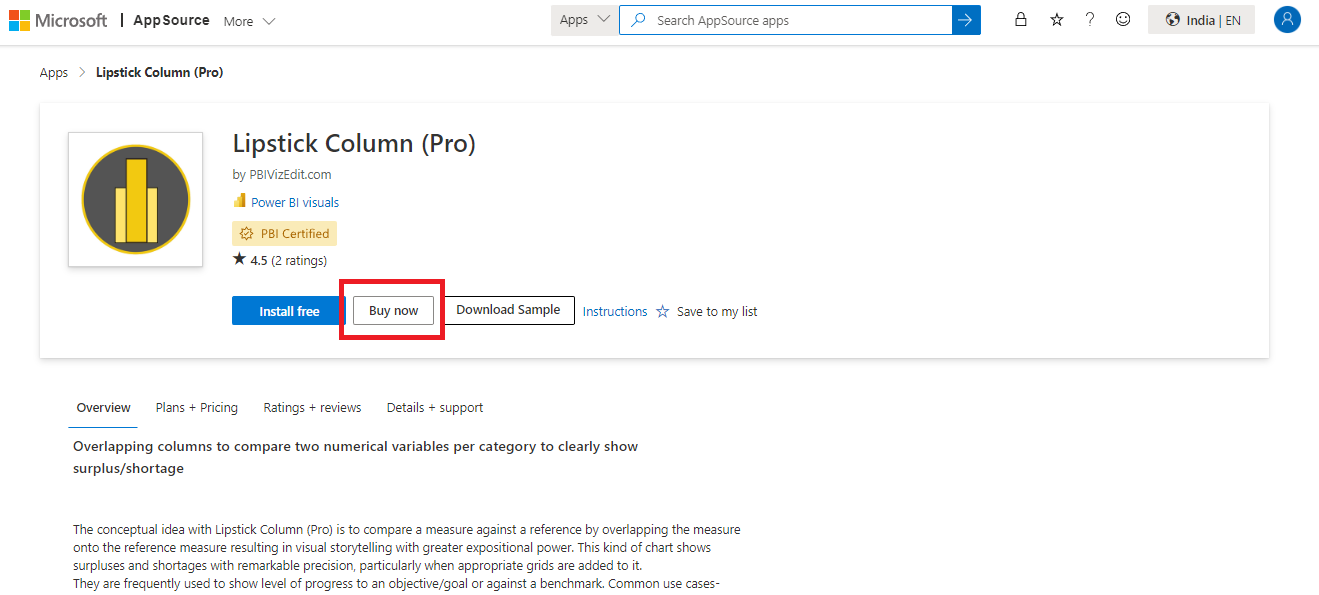
- Step 4a: Open the appsource (marketplace) page where you downloaded this visual.
If you accessed appsource from
• the Power BI Desktop client, click on drop down next to the blue Add button, and click on Buy Now• the web browser at appsource.microsoft.com click on the Buy Now button as shown below image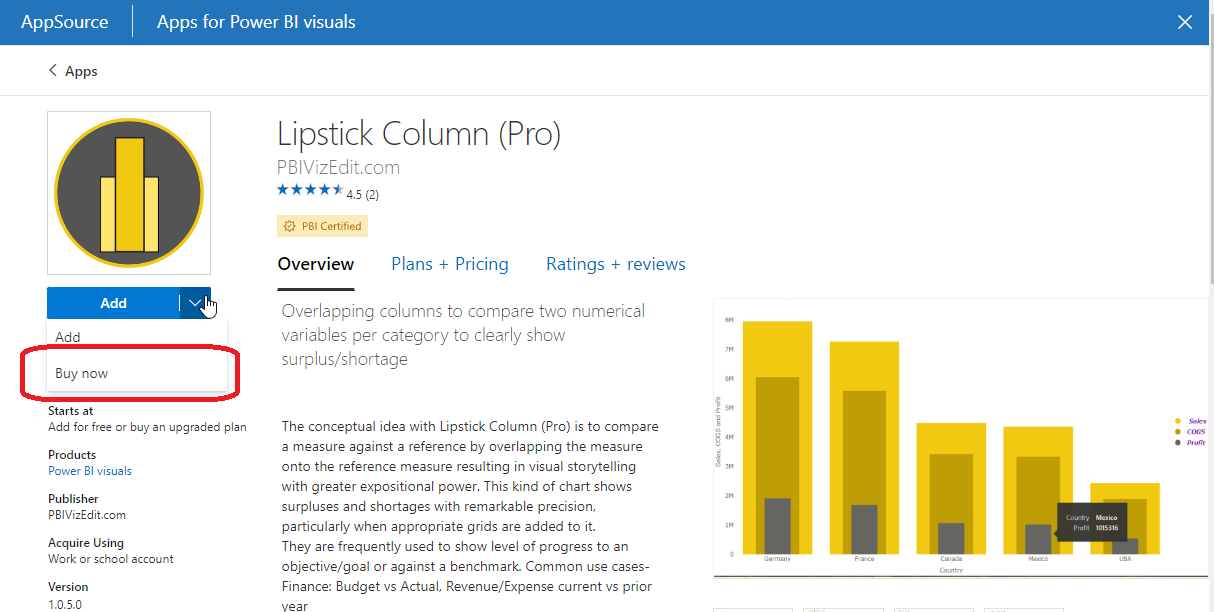
- Step 4b:
In the subsequent Checkout screen, select the plan relevant to you. Alternatively, you could select the smallest plan (1-5 users) for trial, and then select a relevant plan later. After you have selected your preferred plan, click Next button at the bottom.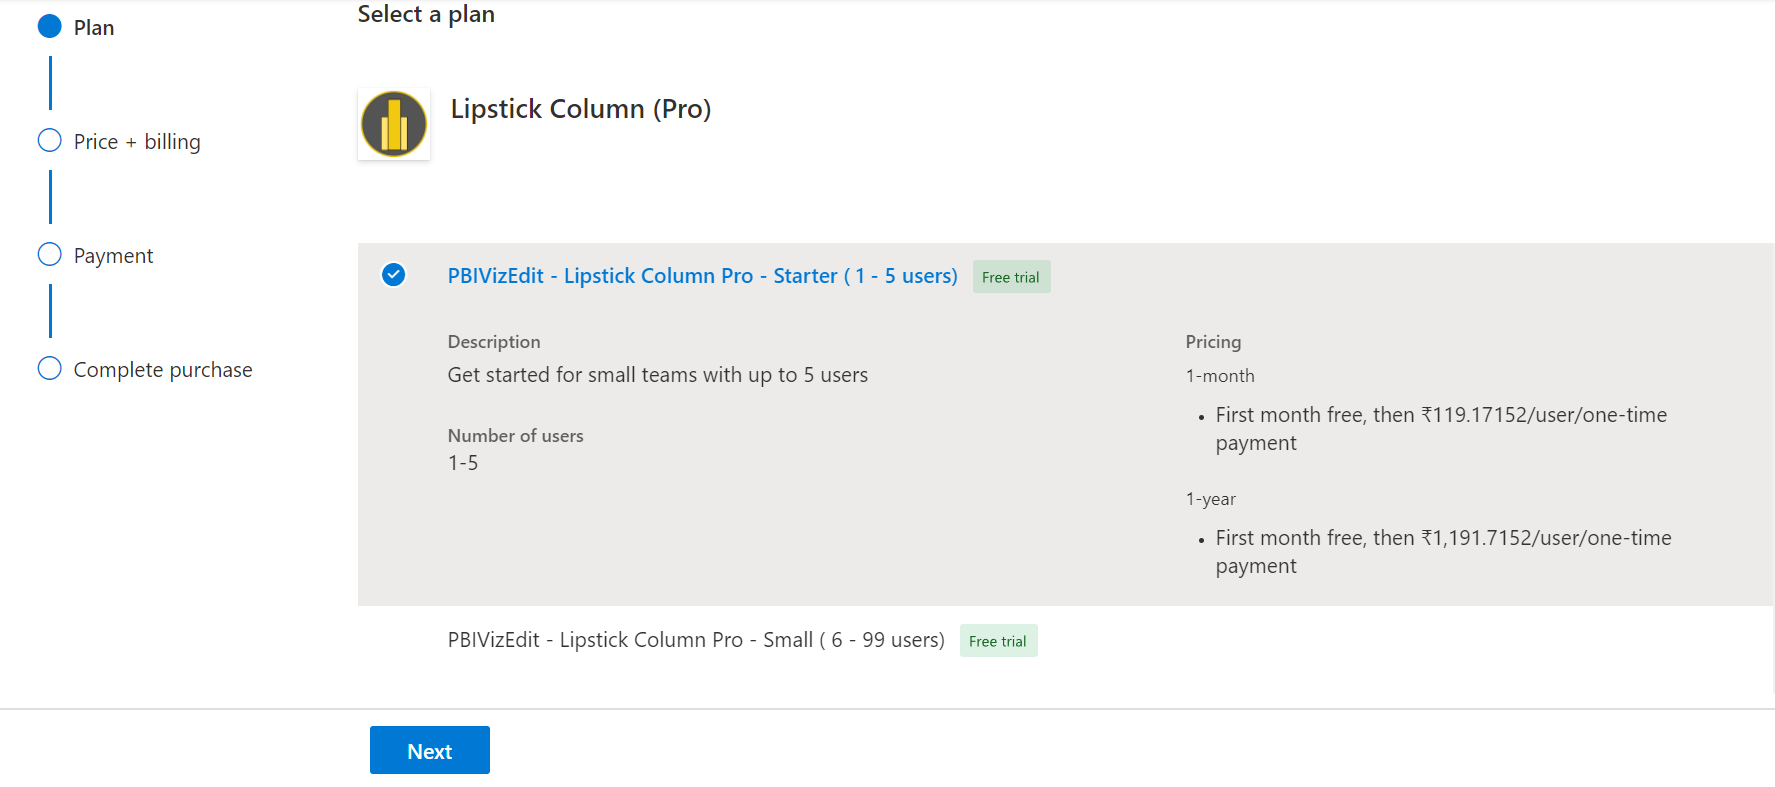
- Step 4c:
In the Price + Billing screen, for Free Trial, make sure to select the Billing term as 1-month and Turn off Recurring billing
- Step 4d:
In the Payment screen, make sure Free trial is displayed at the top of screen, and add Billing account and Billing profile.
Review and click Place order button at bottom.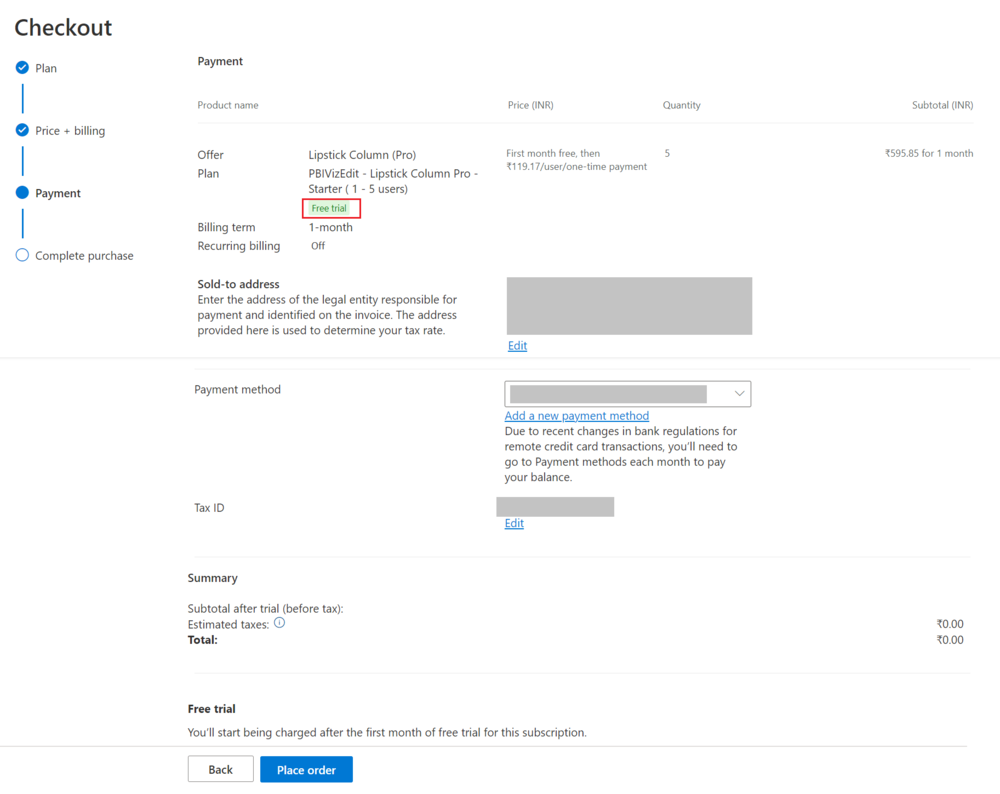
- Step 4e:
Once the order is placed, click on Assign Licenses button at bottom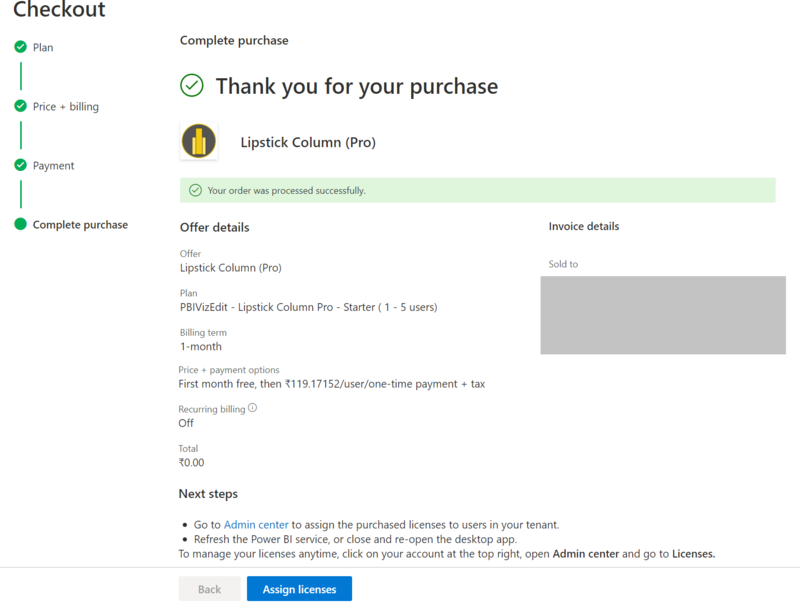
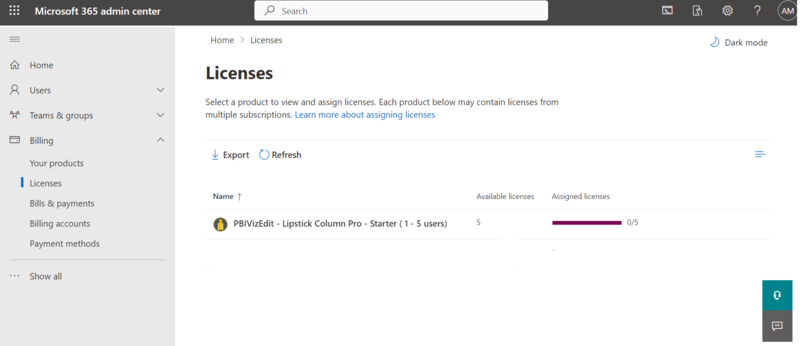
- Step 4f:
The licenses are assigned from the Microsoft 365 Admin center. Clicking on Assign licenses will open up the Admin portal for you. You should see all the Microsoft managed products that you have available, along with the license you just purchased.
Click on the name of the license to open up the assignment screen. You can assign licenses from the next screen by clicking the Assign Licenses button.