How to use Multi-level sorting in PBIVizEdit visuals
Prerequisite:
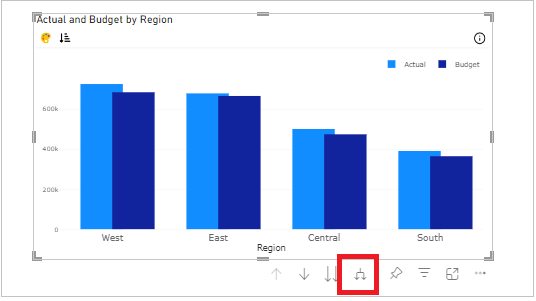
- Once you open the sorting dialog, please proceed further with sorting steps.
To know how to get the sorting dialog, go to this page.
Step 1
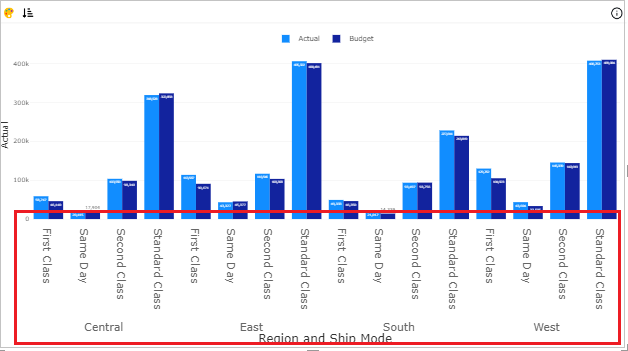
Multi-level sorting is used to sort multi category fields successively. To achieve this, Map more than one field in category (X-axis) in Power BI visualization Pane. Click 'Expand' option as shown below that has taken one hierarchy down.
Step 2
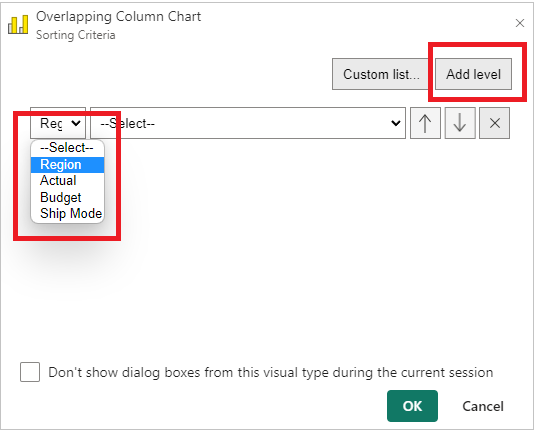
Click ‘Add level’ button in sorting dialog, then select the field that you want to sort from the drop-down.
Step 3
a. Select a sorting criteria from the drop-down based on the field type that you already selected. Repeat Step 2 and Step 3 to add another level of sorting.
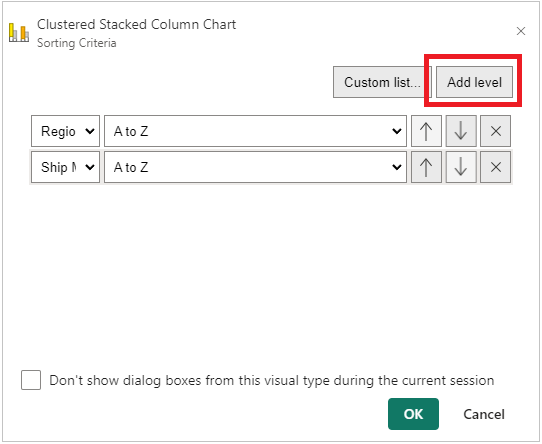
b. To modify the sorting priority of the data field, use "Arrow up" and "Arrow down" buttons. Click ‘X’ button to remove the mapped sort level.
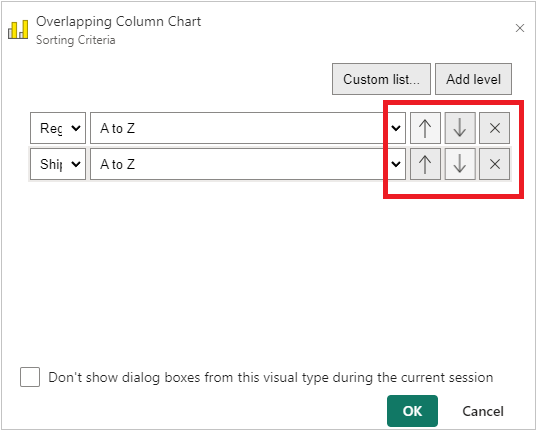
c. Click OK button to apply multi-level sorting.